Loading...
play.acediamc.com
Click to copy IP
Everyone plays together on one world, whichever device you are on. Pick your platform below.
Server address: play.acediamc.com
Java Edition
Add play.acediamc.com to your server list and connect. No port is needed.
Bedrock Edition
Phone, tablet, Windows or Switch. Add a server with:
Xbox and PlayStation: joining by friend
This is the easiest way to join on console, and it works again as of 1 September 2026. If you would rather not add a friend, BedrockConnect further down this page still works too.
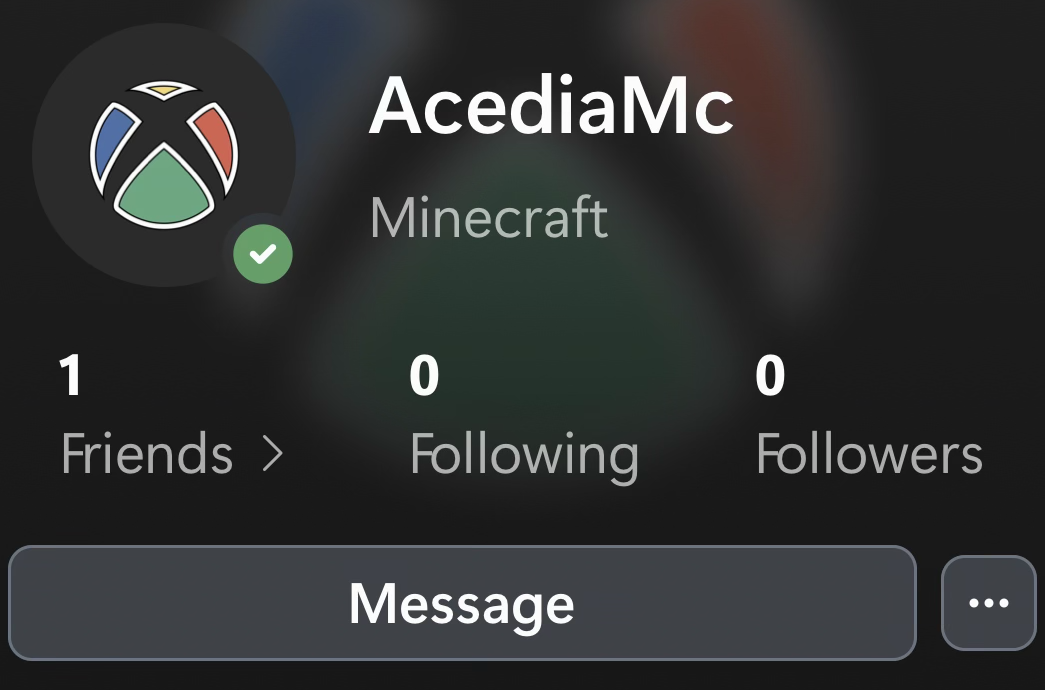
Step 1. Add the gamertag AcediaMC as a friend. That is our server account rather than a person, and it stays online.
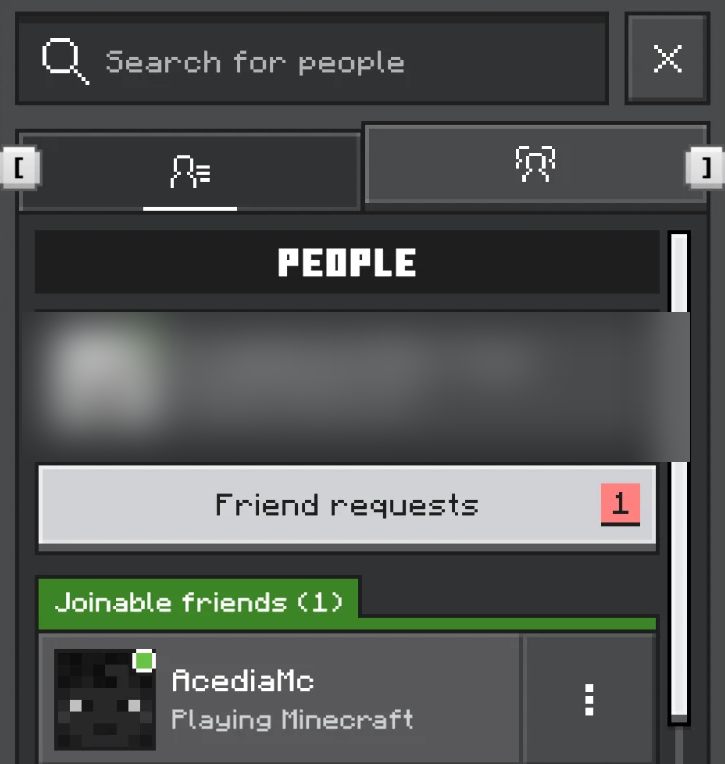
Step 2. Open Minecraft, go to the Friends tab, and select AcediaMC under Joinable friends.
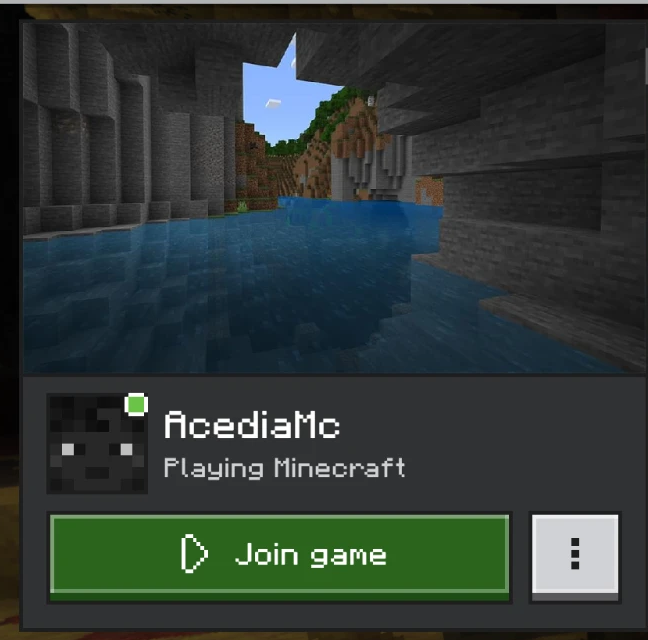
You can also open the AcediaMC profile and press Join game.
The easiest way afterwards
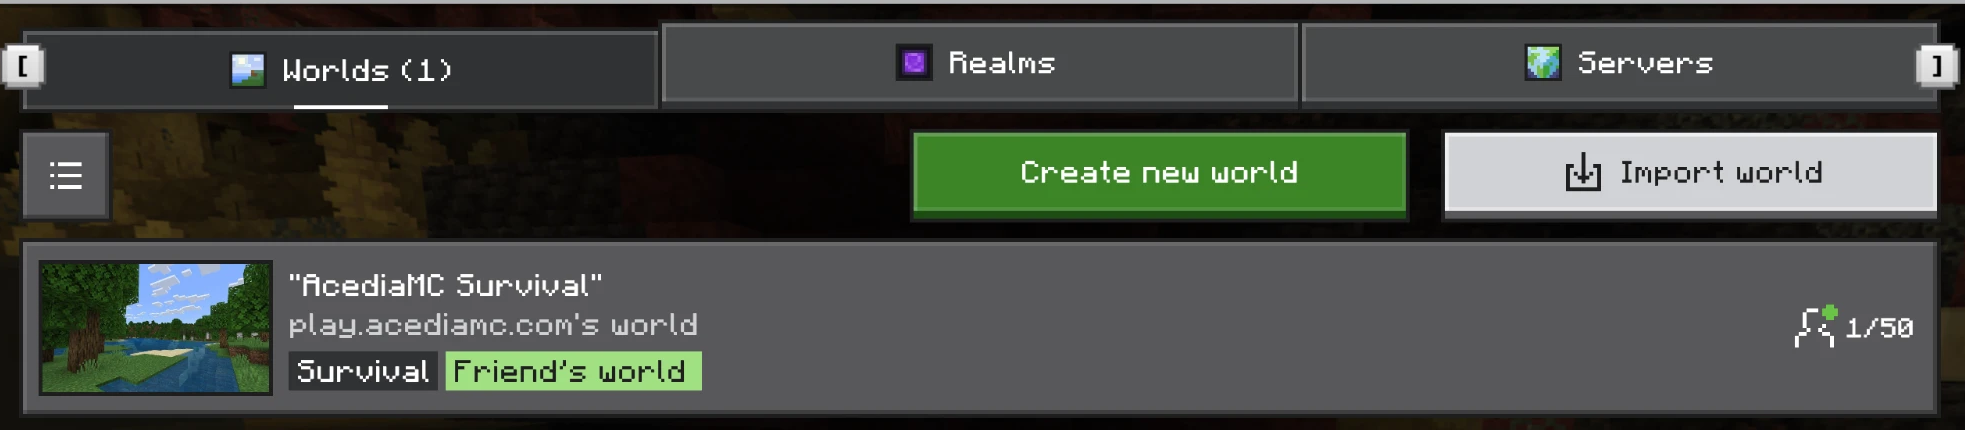
Once you are friends, the server appears on your Play screen under Worlds as AcediaMC Survival, tagged as a friend's world. Join straight from there, like any single player world.
Stuck?
Ask in our Discord and somebody will help you get on.
Console: the reliable way (use this one)
Consoles cannot type in a server address, but there is a way around it. BedrockConnect is a free, open-source project that turns Minecraft's Featured Servers list into a server browser you can add any address to. You set it up once on the console and it stays.
It is not run by us, and it works by changing your console's DNS setting so that the featured server entries point at their server list instead. You can set the DNS back to automatic at any time.
Step 1. Set your console's DNS by hand. The address is not the same on every console, so use the block for yours.
Xbox
The full path is: Settings, then General, then Network settings, then Advanced settings, then DNS settings, then Manual. Step by step:
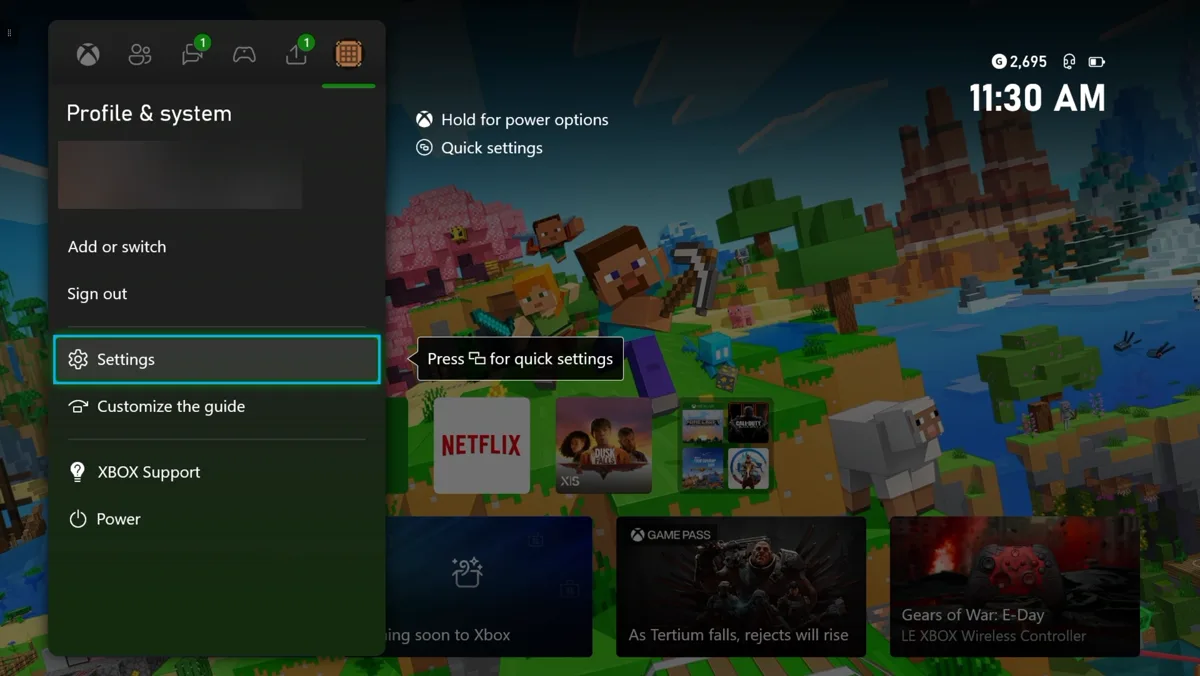
1. Press the Xbox button to open the guide. Go across to Profile & system and choose Settings.
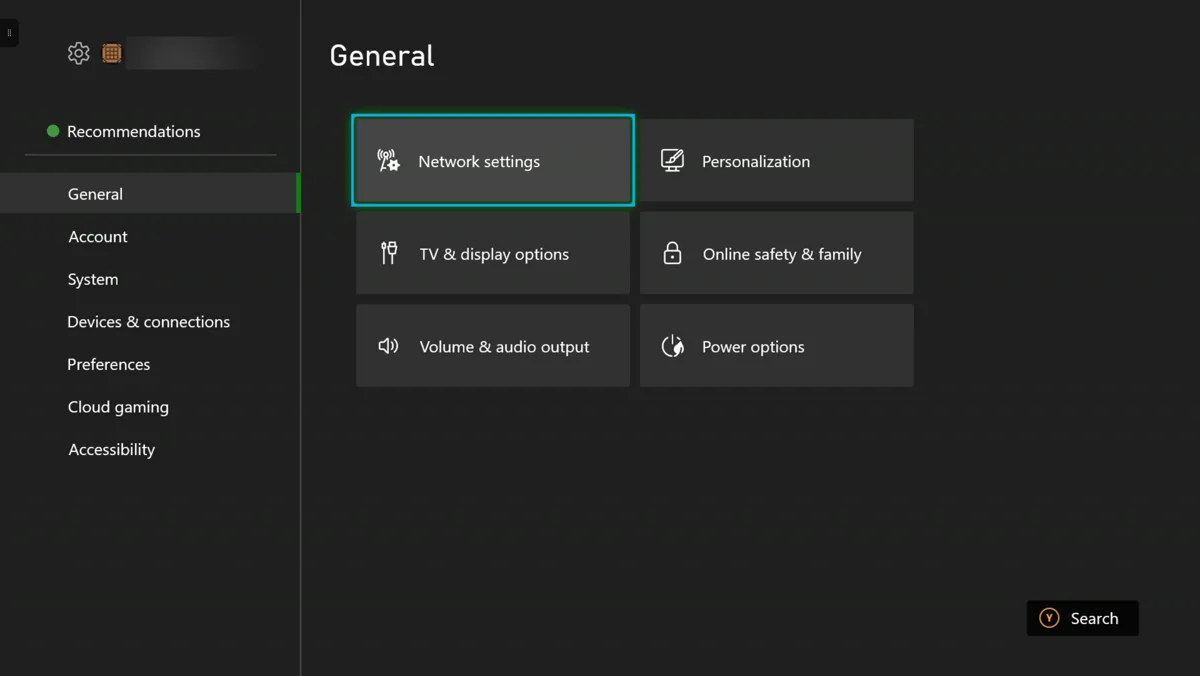
2. Settings opens on General. Choose Network settings, the first tile.
3. On the Network screen, choose Advanced settings, in the middle column at the bottom.
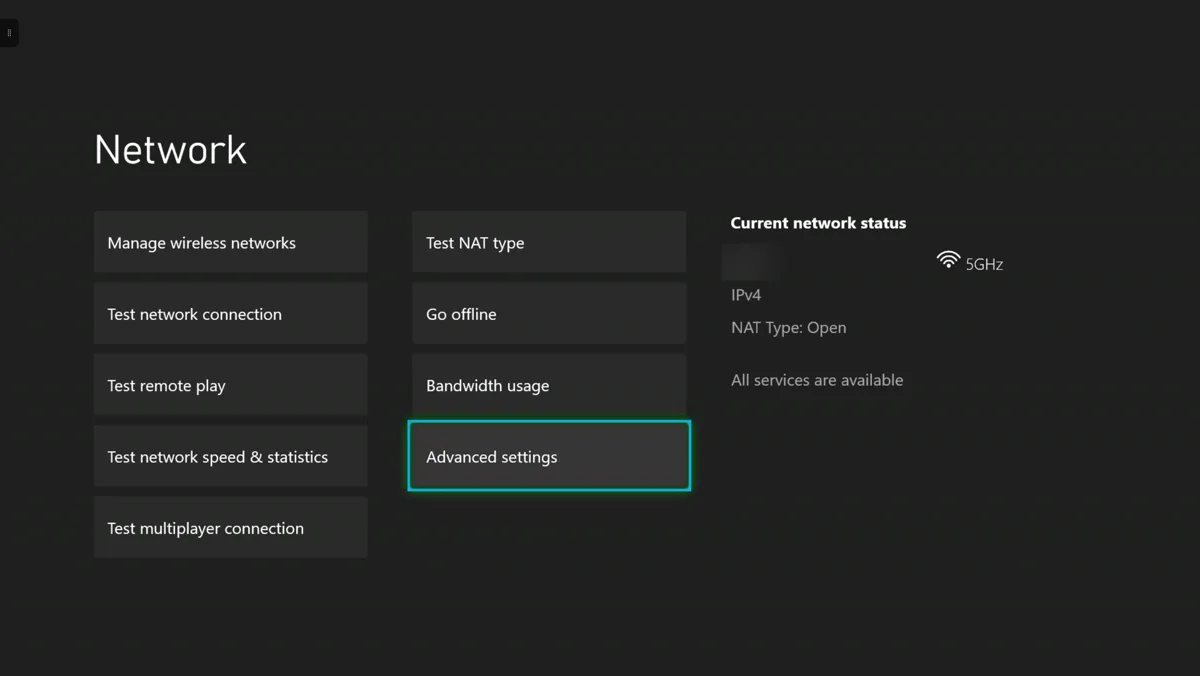
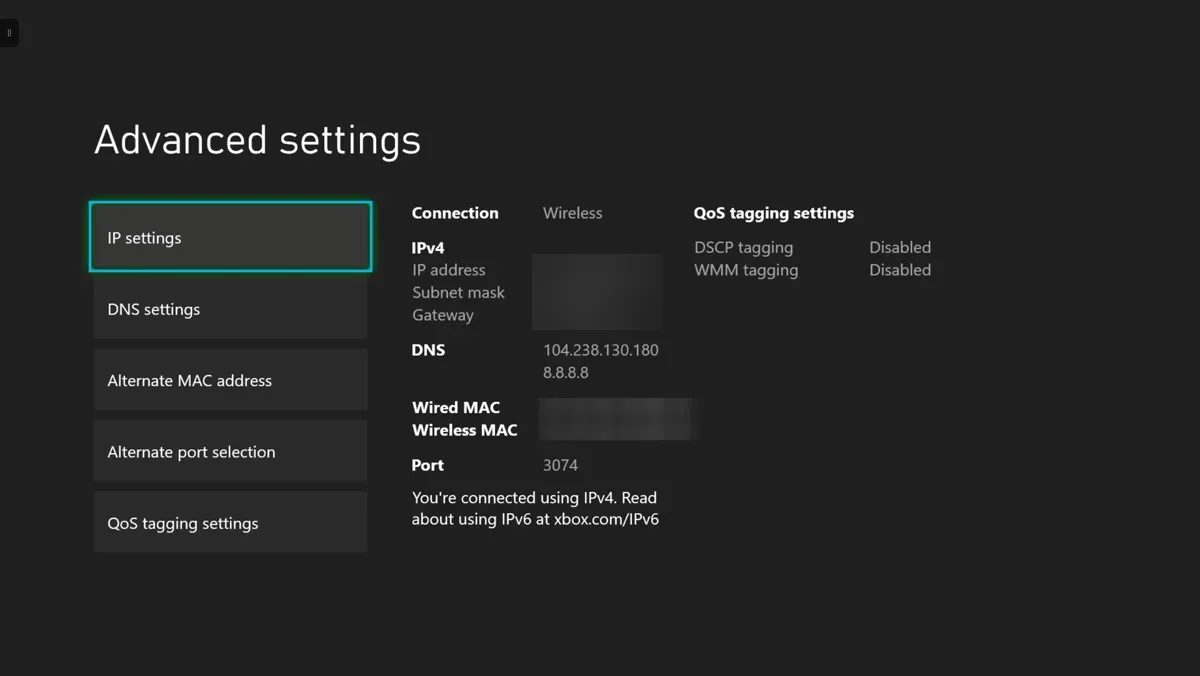
4. Choose DNS settings, then Manual, and type in the two addresses above.
When you are done, the Advanced settings screen shows both values under DNS, like this:
Nintendo Switch
The full path is: System Settings, then Internet, then Internet Settings, then choose your network, then Change Settings, then DNS Settings, then Manual. Step by step:
1. From the Switch home screen open System Settings, scroll down the left column to Internet, and choose Internet Settings.
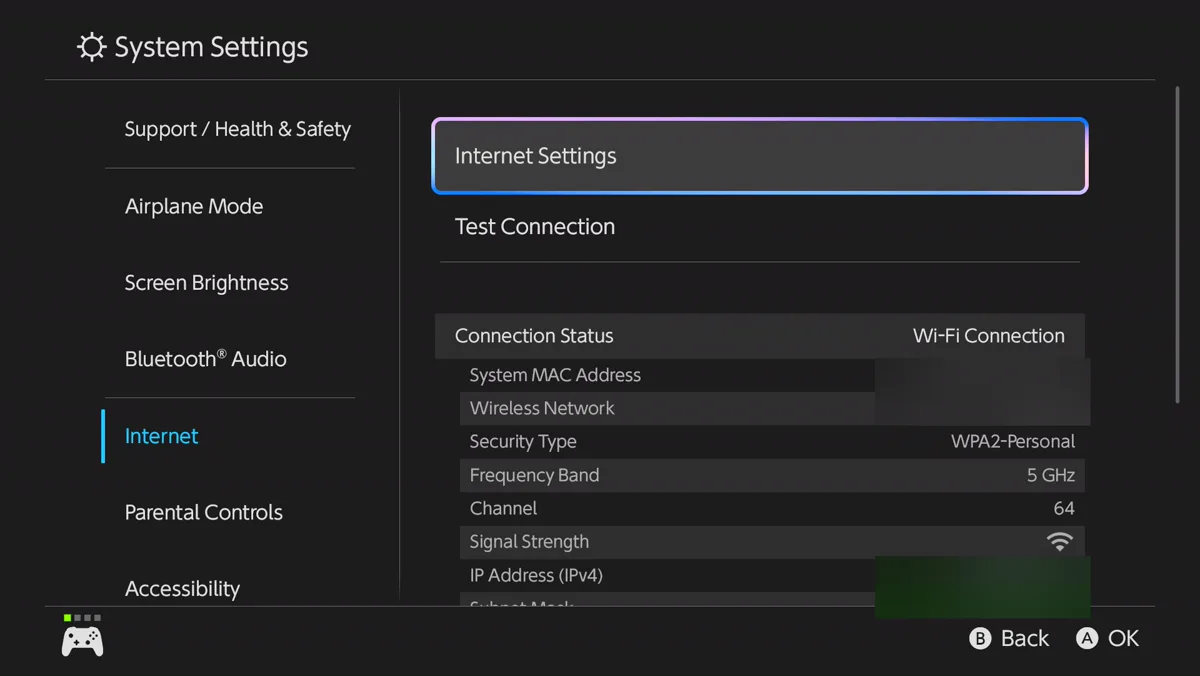
2. Under Saved Networks, choose the network you are connected to and press A. A small menu opens. Pick Change Settings — not Connect to This Network, and not Clear Settings.
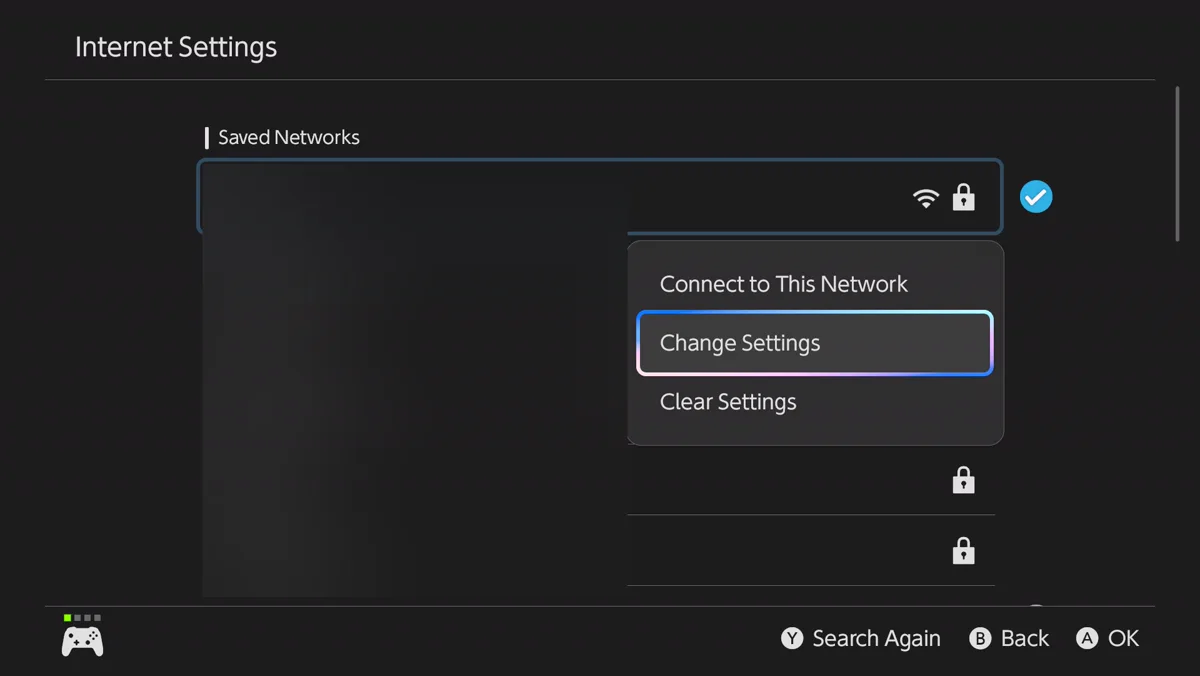
3. Scroll down past IPv4 Address Settings to DNS Settings. It will say Automatic.
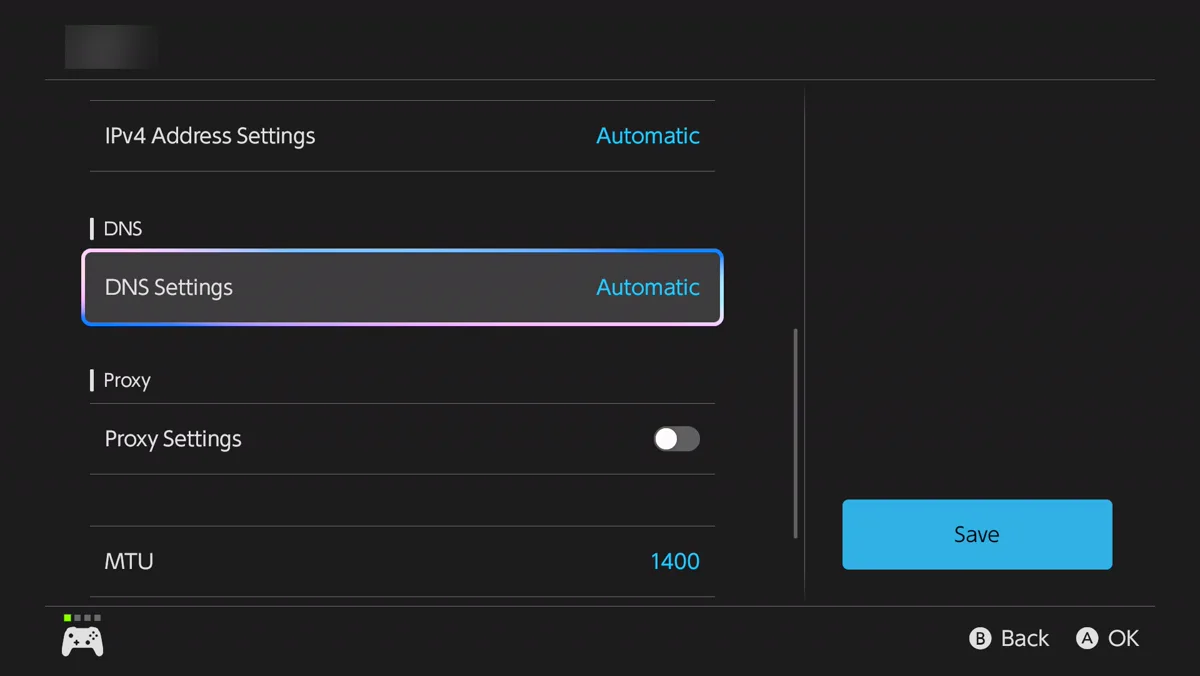
4. Press A on it and change it from Automatic to Manual.
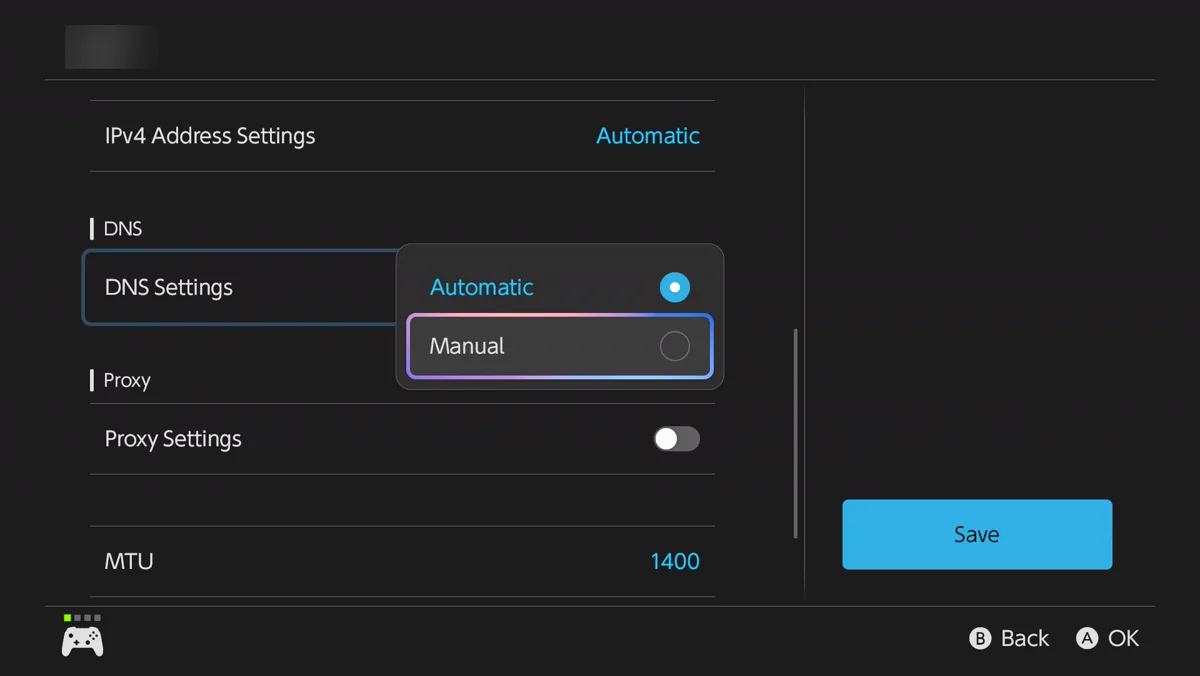
5. Two new rows appear. Enter the addresses above into Primary DNS (IPv4) and Secondary DNS (IPv4), leave both IPv6 rows alone, then choose Save.
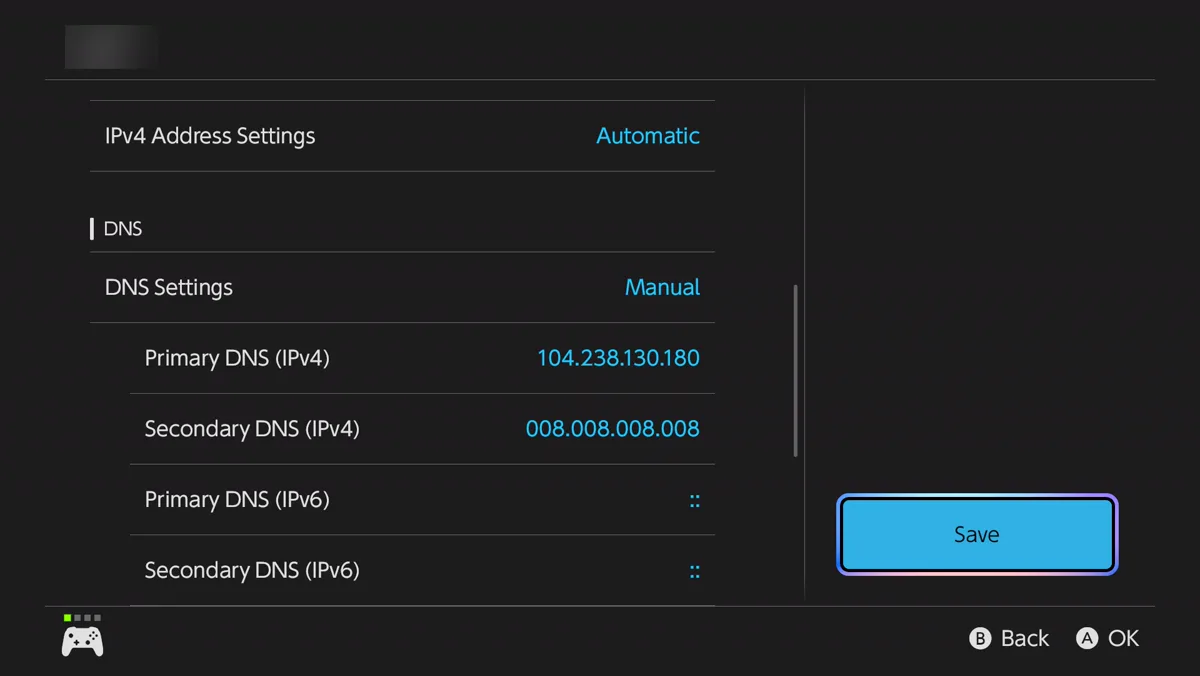
The Switch pads each part out to three digits, so 8.8.8.8 is shown back to you as 008.008.008.008. That is the same address and it is correct — nothing to fix.
PlayStation
PlayStation uses a different address. If you enter the Xbox one it will not work.
The full path is: Settings, then Network, then Settings, then Set Up Internet Connection, then pick your connection, then Advanced Settings. Step by step:
1. From the PS5 home screen, choose the gear icon in the top right to open Settings.
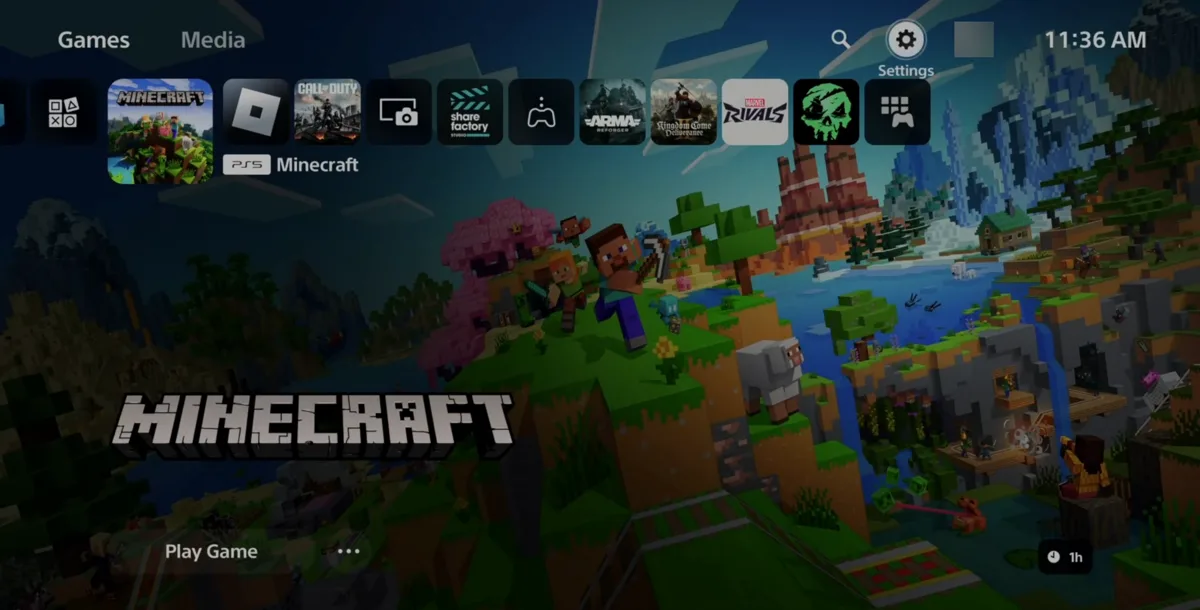
2. Scroll down the Settings list to Network.
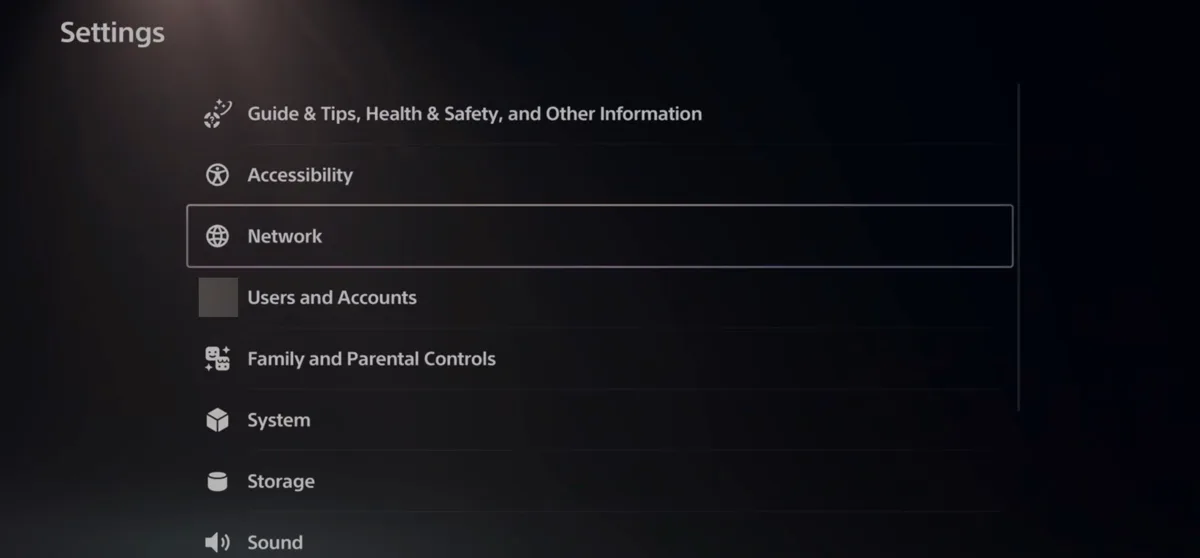
3. Network opens on Connection Status. That is just information, so move to the left column.
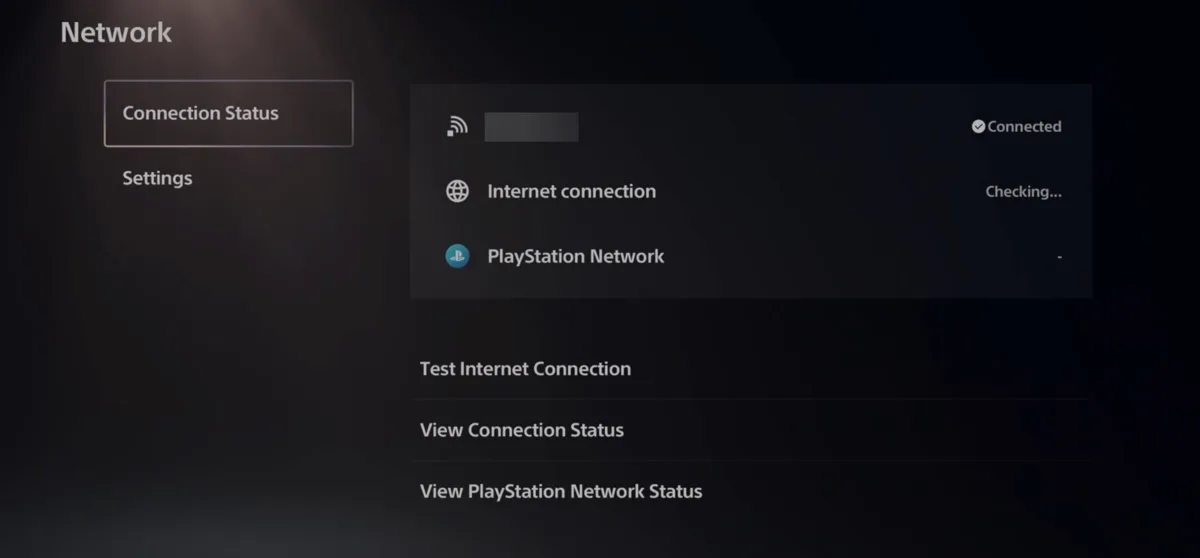
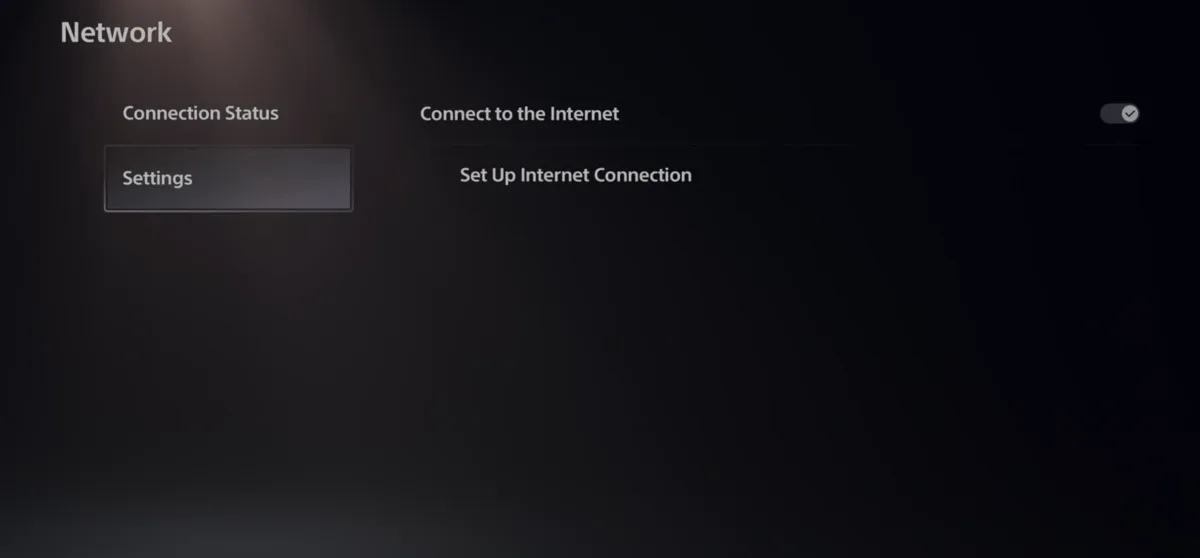
4. Choose Settings in the left column, then Set Up Internet Connection on the right.
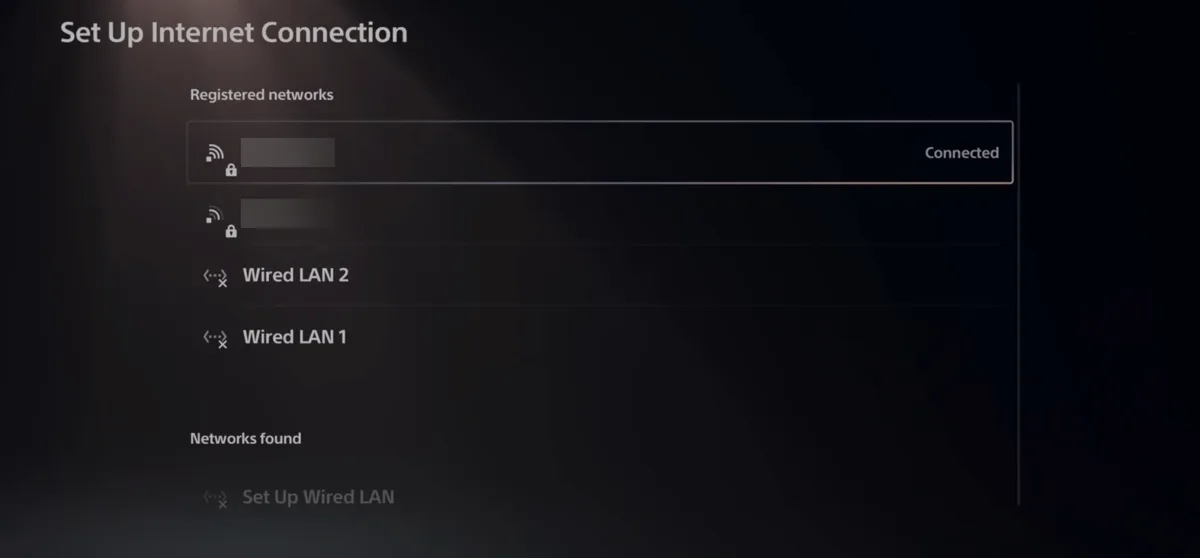
5. Under Registered networks, highlight the network you are connected to. Do not press X to connect — press the Options button on the controller instead.
6. A menu slides in from the right. Choose Advanced Settings — not Forget, which would delete the network.
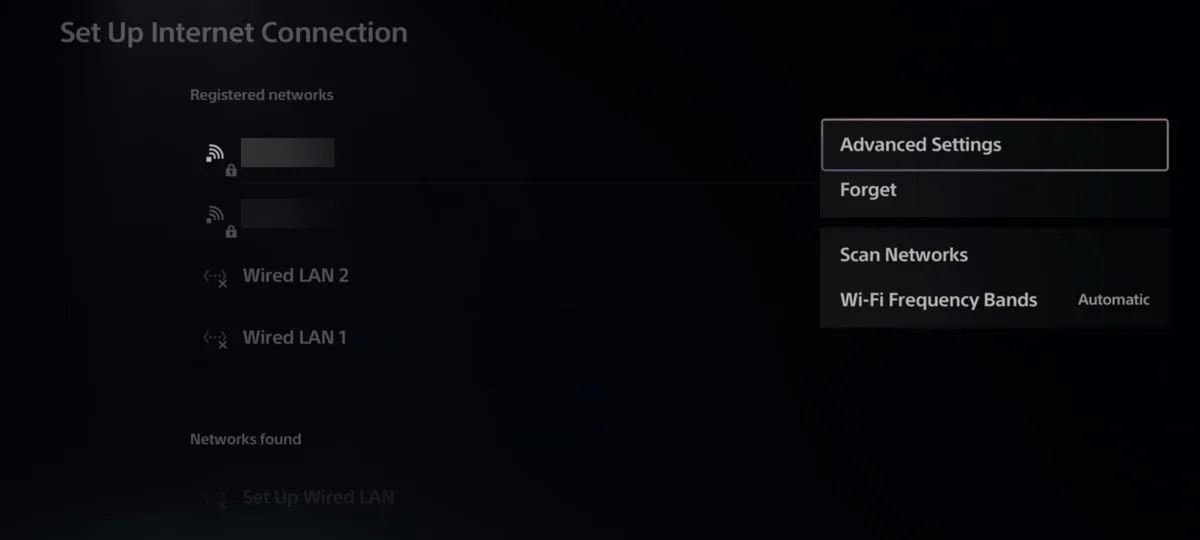
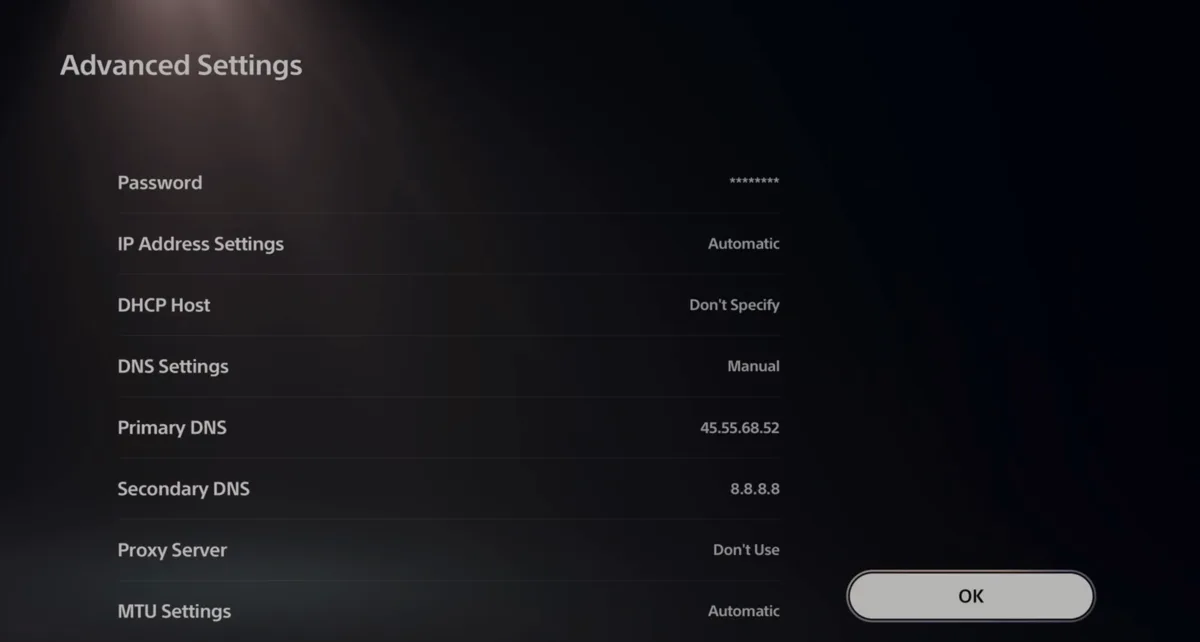
7. Set DNS Settings to Manual, then fill in Primary DNS and Secondary DNS with the two addresses above. Leave IP Address Settings on Automatic and Proxy Server on Do not Use. Choose OK.
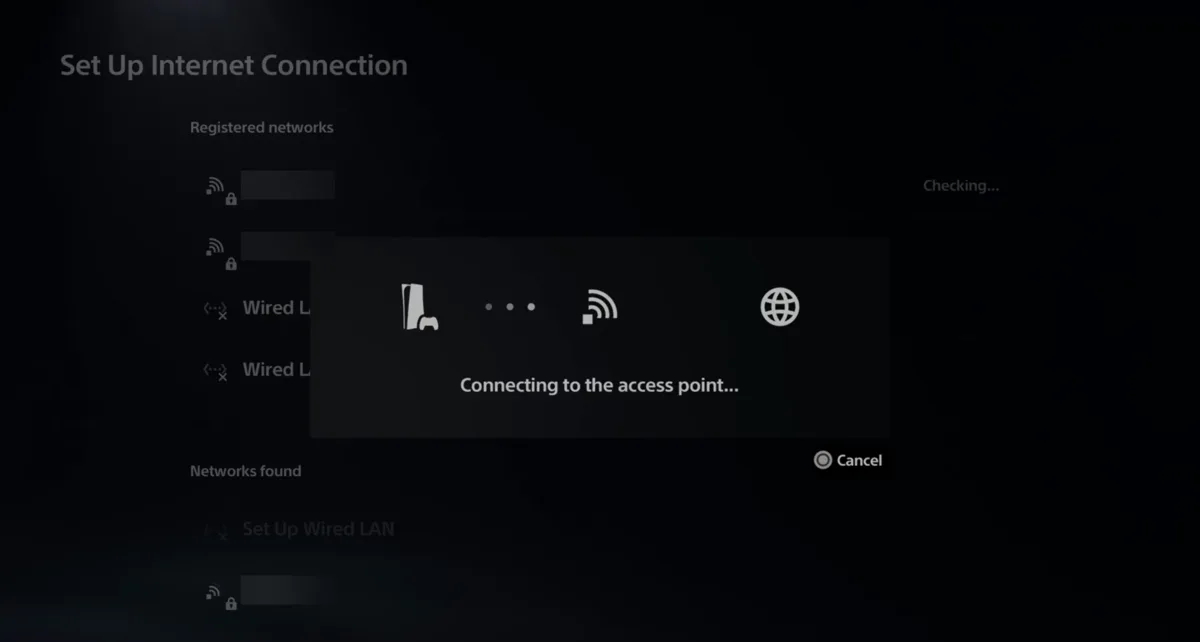
8. The console reconnects and tests the connection. Let it finish.
Step 2. Fully restart the console — a complete shutdown, not sleep. Consoles hold on to the old DNS until they are properly restarted, and this is the most common reason the next step appears to do nothing.
Step 3. Open Minecraft, go to the Servers tab, and join one of these five:
It has to be one of those five. The featured server list is long and keeps growing, and every other entry connects you to that server normally, with no sign that anything is different. If nothing seems to happen, this is almost always why. Lifeboat and The Hive are the most reliable.
You will not actually land on the server you picked. The BedrockConnect list opens instead.
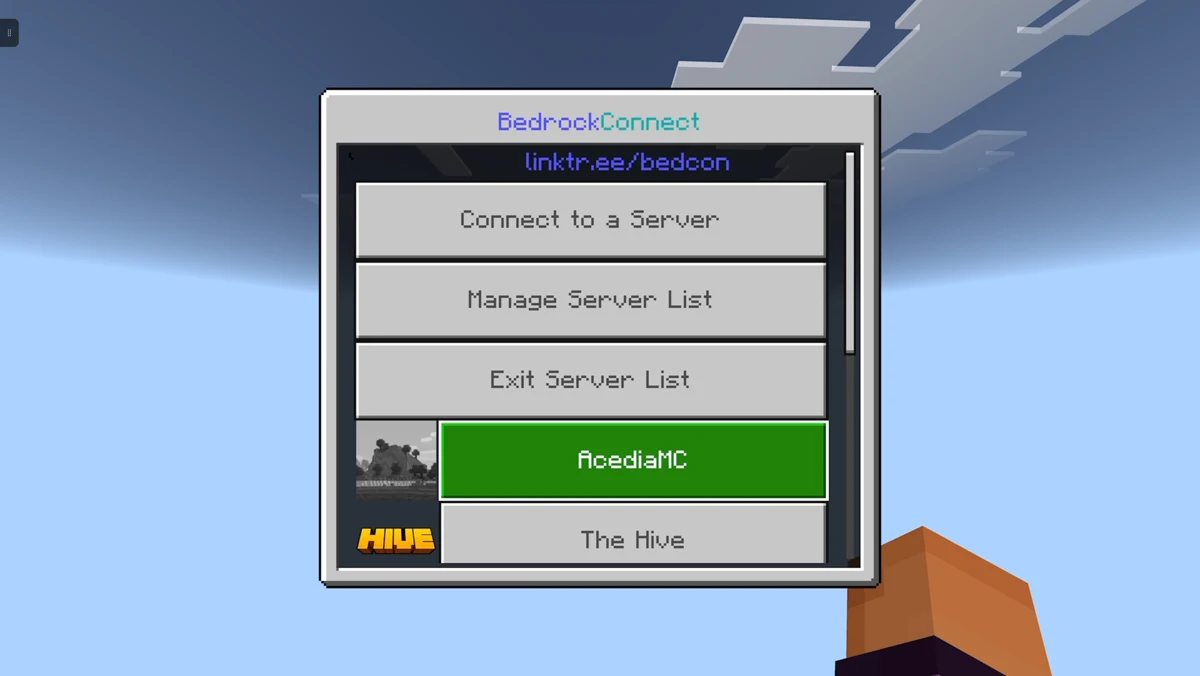
A welcome message appears first. Dismiss it and you get the BedrockConnect menu:
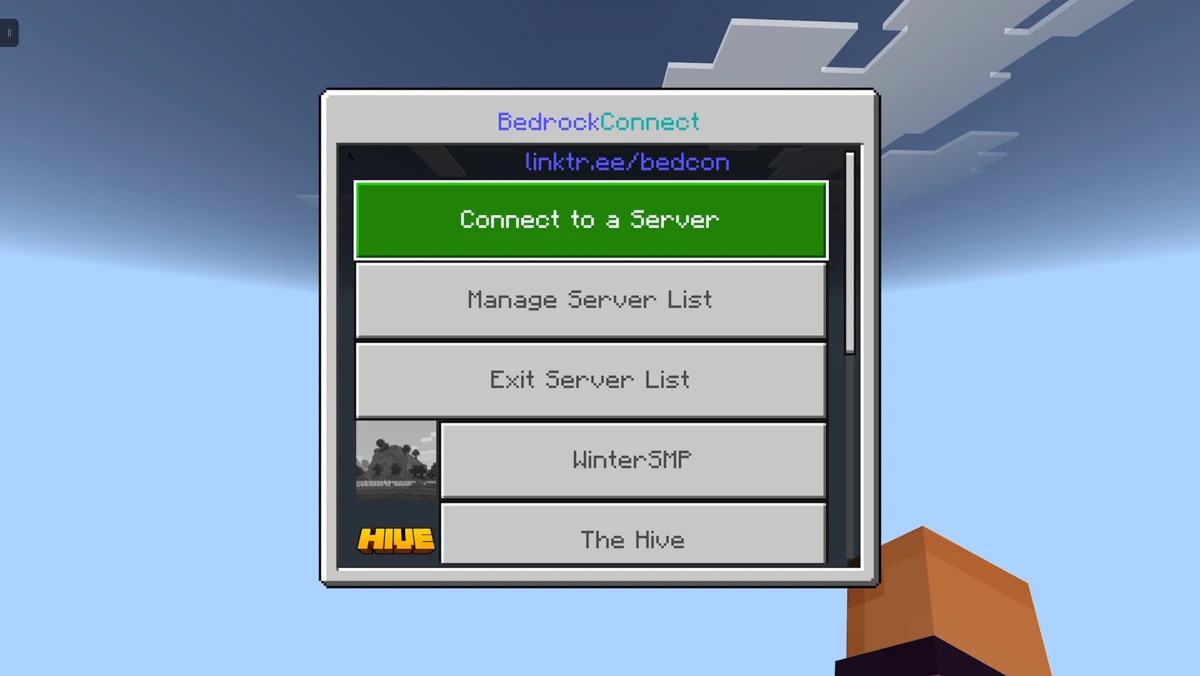
Step 4. Choose to add a server, and enter:
Leave Add to server list switched on, and give it a display name so it is easy to find later.
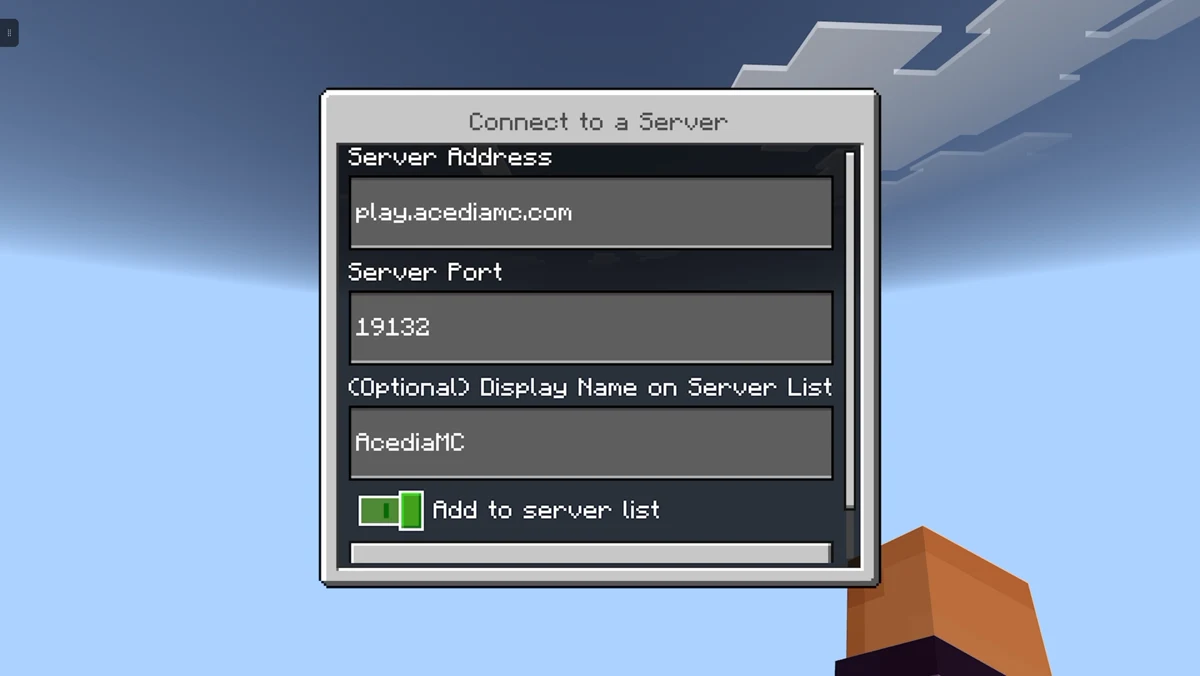
Done. AcediaMC now appears in your BedrockConnect list, so future visits are just: open Minecraft, join the same featured server, and pick AcediaMC.
This route avoids the friend-join problem below entirely.
Console players: known issue
A recent Bedrock update has broken the friend-join method for some players, who are disconnected with an error shortly after joining. This is a fault in the join system itself, not your console or our server, and a fix is expected from its developers. If it affects you, please ask in our Discord and we will help you get on.